
Four Tips for Creating A Gallery Wall

Since getting married 4.5 years ago, my husband and I have lived in 4 different homes/apartments. We purchased a home a year a half ago, so we are more settled now (PTL!). One of my favorite things to do right after moving into a new space was design and hang the gallery wall. We typically would have one gallery wall in the biggest living room space and then also have one in our bedroom. Shortly before we bought our house we lived in an apartment for 8 months, where I had an office. So, I was also able to create a gallery wall of quotes in my office.
Every single time I post a picture of any of our gallery walls, I get an influx of questions about how to do it and questions about where I get my frames and prints.
I thought it was about time I wrote a post about it instead of trying to explain it in a DM on Instagram.
Four Tips for Creating A Gallery Wall:
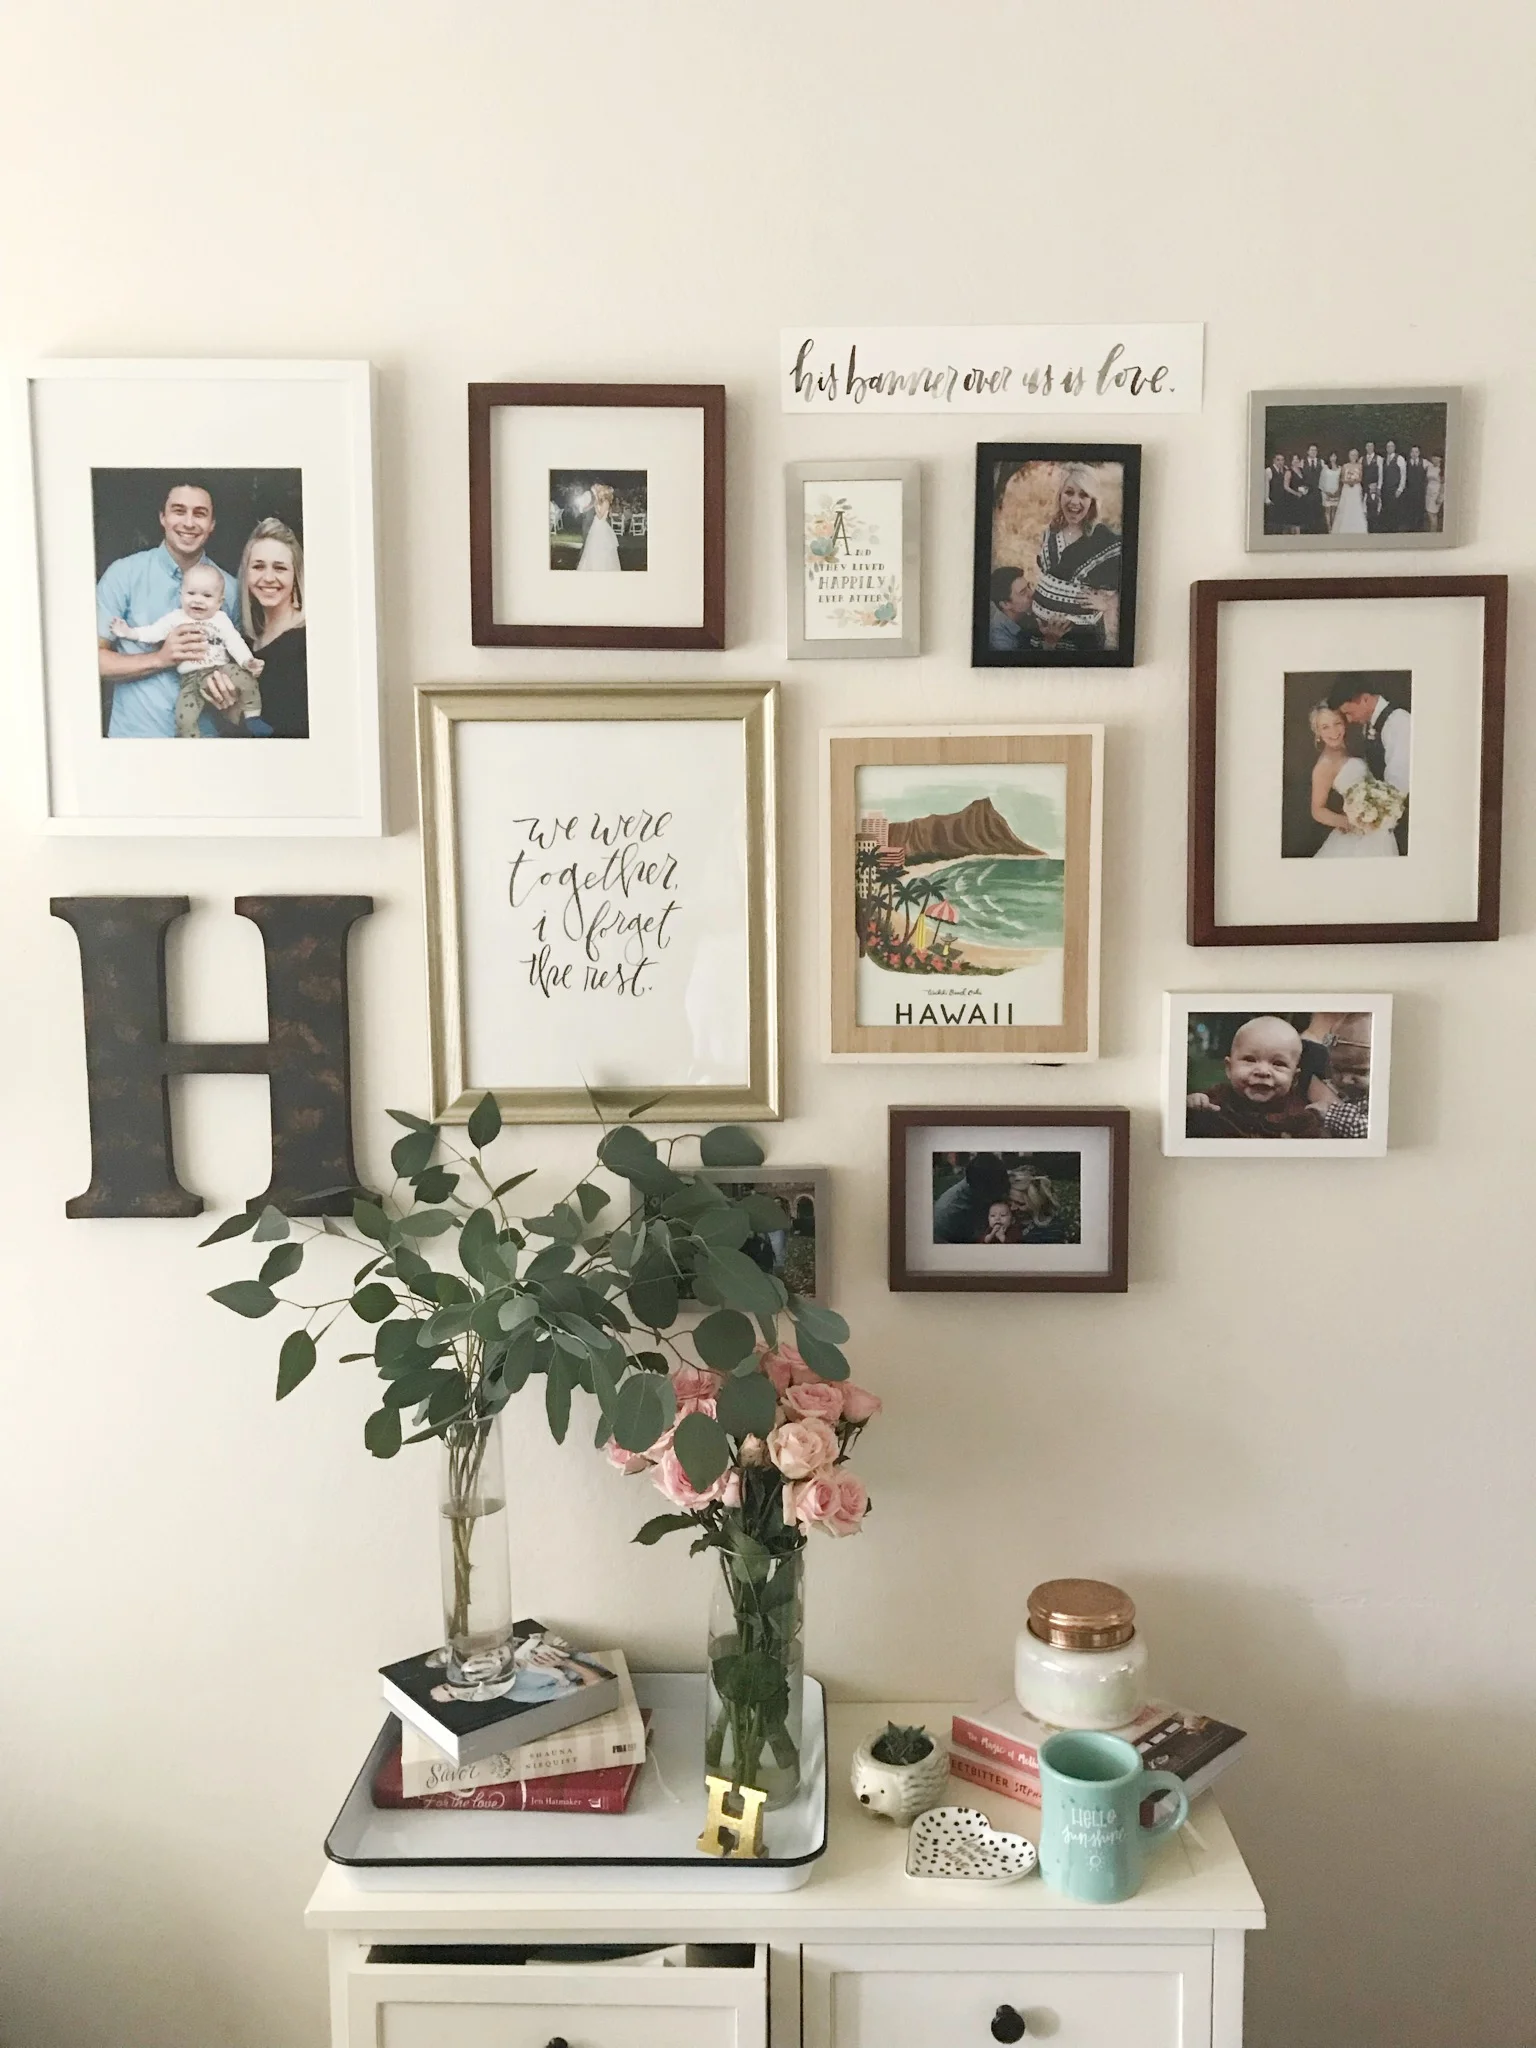
Know the space: what vibe are you trying to accomplish? Think about how much space you have and how many frames you can use. Are you wanting to only do art prints? Or is this mostly for photos? Make a decision about what type of gallery wall you want to create.
Gather the frames: I like to work with an odd number of frames and I also like to include an object like a letter. These are good options. For me, I like to work with different sizes and orientations. So, I will often have one bigger frame (11”x14”), one medium size (8”x10”) and then the rest are a small size (5”x7” and 4”x6”). I gather as many frames and objects that I have available, so I can swap out things as needed and adjust when things don’t look right.
Lay it out on the floor: this is the most important step! You can’t just start hanging things on the wall. Almost every gallery wall I have created looked better in my head than it did on the wall. So, once I laid it on the floor, I realized it wasn’t what I wanted. This is where I was able to move things around, swap out frames, swap out pictures or prints, and make it just right. You MUST also snap a photo of the laid out design. You will use this as your guide for transferring what you created on the floor, onto the wall. I lay everything out, snap a photo, and then my husband and I work together to get everything on the wall. He holds it up and I make more adjustments as we go. This can take anywhere from 45-60 minutes. Sometimes more!
Mix it up: vertical, horizontal, prints and pictures, frame size, frame color, etc. The key to making your gallery wall look GOOD is having the right amount of variance. You don’t want everything to be similar, but you don’t want it to be too different either. It might take some time, but just play around with it until it looks like how you want it to look. And if it just isn’t getting right, take everything away and start from scratch again.

this image is from our hallway gallery wall and it's a dungeon in there, so please excuse the terrible lighting!
I always suggest having one big print ( 8”x10” or 11”x14”) with lettering and one small one (4”x6” or 5”x7”). We have a bunch of options for you to choose from for your gallery wall!
And if you aren’t able to find exactly what you want, we also offer custom prints! Just send us a message and Rachel will create the perfect print for your home!